Quantcast
Channel: Reports – PDQ.com

PDQ Deploy 7: Deployment Reports

$
0
0

PDQ Deploy 7 beta is now available. To receive beta updates, you can opt-in within your PDQ console by clicking File > Preferences > Auto Updates and enabling Include Beta Versions. You can also click the link sign up for email notifications to be notified of future beta and/or full releases of PDQ Deploy.

Note: If your PDQ Deploy license is expired, you will need to renew it before you will be able to update to get the latest features. Log in to your customer portal to renew your license.

PDQ Deploy 7 allows you to print, export or email reports on your deployments and scheduled deployments

Deploy Reports Button

Viewing and Customizing Reports

PDQ Deploy now includes a Reports button on the toolbar that allows you to print and/or export several different prebuilt reports that can be customized using report profiles.

Additionally, you can print what is displayed in the active panel of the console by clicking the Print Preview button to print or export that information. The Print Preview button remains unavailable until printable information in the console is selected.

In order to activate the Reports button, you must first navigate to a deployment, schedule, package, or item on which you want to report, then click the Reports button. The report types and associated profiles available from the drop-down are dependent upon what was selected within the console prior to clicking Reports.

Play around and select the different reports and profile types to get familiar with what information is available.

image21


Customizing Report Profiles

There are only two report types with customizable report profiles: Deployment Details and Schedule Details. If you’re a Pro or Enterprise-level customer, you can customize these report profiles to fit your needs. Free users cannot edit or create new profiles may only use the default profiles provided.

After selecting your report, the print preview window will open. In the Deployment Details report and Schedule Details report next to the profile drop-down, you can either Edit, Add, or Delete the selected profileDepending on the report you are using, either the Deployment Report Profile window or the Schedule Report Profile window will pop up for you customize the profile.

Deployment_Report_Profile


Schedule_Report_Details_1

Sharing your Reports

Print or Export Your Reports

You can sharing your reports by printing or exporting the file as a XLS, PDF, TXT, etc.

Printer

You can do this from the print preview window (which can be accessed by either clicking the Print Preview  button, or by selecting a report from the Reports dropdown).

Set Up Post Deployment Email Notifications

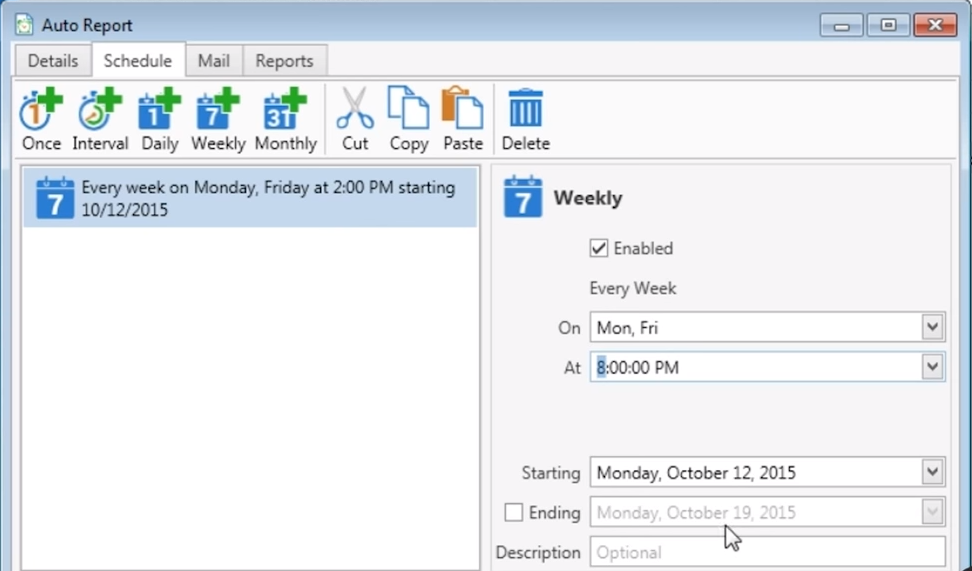
You can also setup post deployment email notifications to managers or coworkers that will automatically send when the deployment is complete. First, set up your mail server settings in File > Preferences > Mail Server. Next, you will need to create your notification preferences in File > Preferences > Mail Notifications. Once your notifications have been created, you can now choose to send out a Post Deployment Notification from within the Deploy Once window or the Schedule > Options tab.

Preferences_Mail_Notifications

The post PDQ Deploy 7: Deployment Reports appeared first on Admin Arsenal.


Setting Up Auto Reports in PDQ Inventory

$
0
0

Let’s talk reports. You may already be familiar with reporting in PDQ Inventory and know how to build reports and how to build reports from collections. But did you know you can now create reports that automatically run and even email those reports to whomever you need?

Auto Reports are an Enterprise-level feature. Try them out for free in a 14-day trial:


Setting Up an Auto Report

Select the Auto Report option from the left tree and then click the New button in the right corner to create your auto report. 

You can also select any reports you’ve already created and right click on them select Attach to Auto Report > New Auto Report. You can attach multiple reports to an Auto Report. 

You’ll first give your report a name and a path where you want your reports to be saved to. You can type in your own file name, or use the drop down where a list of variable names are listed. These are useful for keeping reports organized, especially those with variable $(Date) for scheduled reports. 

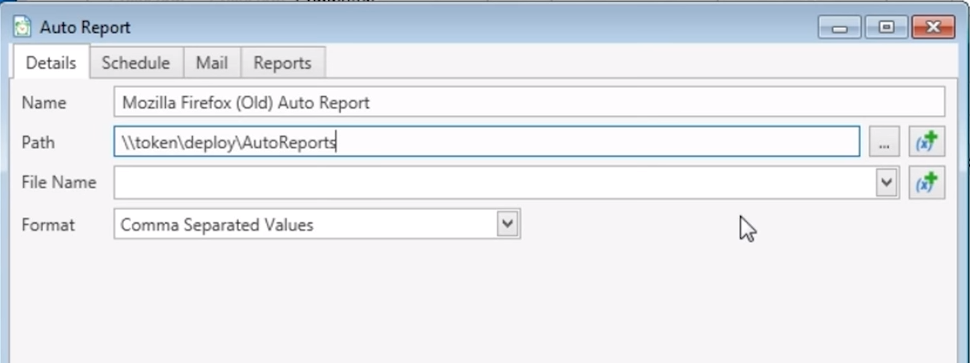
Reports can be sent as a PDF, XLS, CSV, and more. 

Next, if you’re familiar with scheduling deployments in PDQ Deploy this won’t be too new to you. You have a lot of flexibility in scheduling. You can either schedule days to run the reports or set it to run at intervals (for example, every three days). 

Emailing Your Reports

Before you can start sending emails, you’ll first need to set up your email server in File > Preferences > Mail Preferences. Once you have that set up then you can add addresses, subject lines, and compose a message to accompany the attached file. 

You can also use variables in the subject line as well as in the body of the email. So for example, you’re using your report for computers with an old version of Firefox named Firefox (Old) and it runs every Tuesday, then you would put in the subject: New Report on $(Report:Name) for $(Date) which would then email out, New Report on Firefox (Old) for 11/24/2015. 

Email_Auto_Report.png

If you ever need to edit a report you can always just go back to that tree select Auto Reports and right click on any of your auto reports for the option to edit. 


The post Setting Up Auto Reports in PDQ Inventory appeared first on Admin Arsenal.

Remotely Access the Registry

$
0
0

At our last live webcast (you can sign up to join our free IT webcasts here), we discussed Custom Tools and shared some of our favorites. Below is a download for a favorite utility that allows you to remotely access the registry of a target computer you can import for use on your PDQ Inventory console. There are also report filters you can import in to PDQ Inventory for finding local admin accounts on your network. Please note that this utility is not supported by Admin Arsenal and it only works in English. This is a utility that Shane wrote years ago while he was annoyed (and probably drunk) at the lack of remote registry capabilities in Windows.

Enjoy!

What are Custom Tools?

Using the Custom Tools feature allows you to create keyboard shortcuts to call your favorite tools and utilities. If you have a program/utility that can called from the Command Line (CLI) then you can integrate it with PDQ Inventory. You can set up these Custom Tools by going to File > Preferences > Custom Tools.

Remotely Access the Registry with a Custom Tool 

A favorite utility allows you to open the registry on a target machine. In the webcast it was called “Remote Registry”.
After you unzip this file rename the two .exe.rename files to end in .exe. Use the StartReg64.exe if the console machine is running on a 64-bit OS. There is also a PNG showing the syntax for use in a Custom Tool.

Using PDQ Inventory to Find Local Admins

There are three XML files in the download below to import into PDQ Inventory. In the webcast, Shane walked through each of these examples and how the filters are set up. Click here to jump to that portion of the webcast.

Click here to download the report filters.


The post Remotely Access the Registry appeared first on Admin Arsenal.

PDQ Deploy 7: Deployment Reports

$
0
0

PDQ Deploy 7 beta is now available. To receive beta updates, you can opt-in within your PDQ console by clicking File > Preferences > Auto Updates and enabling Include Beta Versions. You can also click the link sign up for email notifications to be notified of future beta and/or full releases of PDQ Deploy. Note: […]

The post PDQ Deploy 7: Deployment Reports appeared first on PDQ.com.

Setting Up Auto Reports in PDQ Inventory

$
0
0

Let’s talk reports. You may already be familiar with reporting in PDQ Inventory and know how to build reports and how to build reports from collections. But did you know you can now create reports that automatically run and even email those reports to whomever you need? Auto Reports are an Enterprise-level feature. Try them out […]

The post Setting Up Auto Reports in PDQ Inventory appeared first on PDQ.com.

Remotely Access the Registry

$
0
0

At our last live webcast (you can sign up to join our free IT webcasts here), we discussed Custom Tools and shared some of our favorites. Below is a download for a favorite utility that allows you to remotely access the registry of a target computer you can import for use on your PDQ Inventory […]

The post Remotely Access the Registry appeared first on PDQ.com.

7 Things You Didn’t Know You Could Do In PDQ Inventory

$
0
0

As the saying goes, “Ya know, you don’t know what you don’t know”. Instead of delving into the tautology of that statement, let’s just start right out describing seven features of PDQ Inventory that may have been lost in the cracks, fallen through the weeds, been forgotten, are brand new, or have otherwise gotten lost […]

The post 7 Things You Didn’t Know You Could Do In PDQ Inventory appeared first on PDQ.com.

SQL Snippets Episode 1: Using SQL Reports in PDQ Inventory

$
0
0

Welcome to SQL Snippets! Writing SQL queries and building SQL reports on any platform may not always be a simple task. The SQL Snippets series is designed to help teach, assist, and bridge some gaps of knowing what you want in a SQL report and getting the desired results. We’ll be demonstrating examples using both […]

The post SQL Snippets Episode 1: Using SQL Reports in PDQ Inventory appeared first on PDQ.com.


SQL Snippets: Customizing SQL Reports Using the ‘WHERE’ Clause

$
0
0

SQL Snippets Episode 2 In episode 1, we explained how SQL reports can be utilized in PDQ Inventory and Deploy. Today, we’ll discuss customizing SQL reports and how they can optimize your report results by using the ‘WHERE’ clause. Recap of Episode 1: A reports folder was created and a SQL report was built and […]

The post SQL Snippets: Customizing SQL Reports Using the ‘WHERE’ Clause appeared first on PDQ.com.